Nextcloud and OpenID-Connect
NOTE: There is a updated version of the article which works with the latest Nextcloud and Keycloak. Please continue here!
If you looked at the Nextcloud app store you could already find OpenID-Connect connectors before but since Nextcloud 19 it is an officially supported user back-end. So it was time for me to have a closer look at it and to try it out.
Get a OpenID Connect provider
First step was to get an OpenID-Connect provider, sure I could have chosen one of the public services. But why not have a small nice provider running directly on my machine? Keycloak makes this really simple. By following their Getting Started Guide I could setup a OpenID-Connect provider in just a few minutes and run it directly on my local demo machine. I will show you how I configured Keycloak as an OpenID-Connect provider for Nextcloud but please keep in mind, this is the first time I configured Keycloak and my main goal was to get it running quickly to test the Nextcloud connector. It is quite likely that I missed some important security setting which you would like to enable for a productive system.
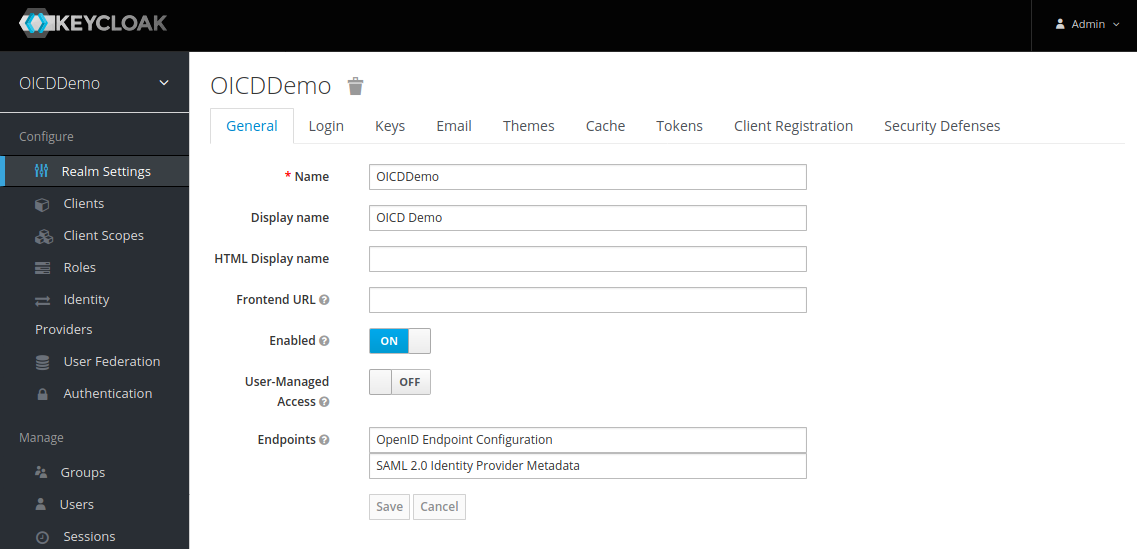
After installing Keycloak we go to http://localhost:8080/admin which is the default URL in “standalone” mode and login as admin. The first thing we do is to configure a new Realm in the “Realm Settings”. Only “Name” and “Display name” need to be set, the rest can be kept as it is:

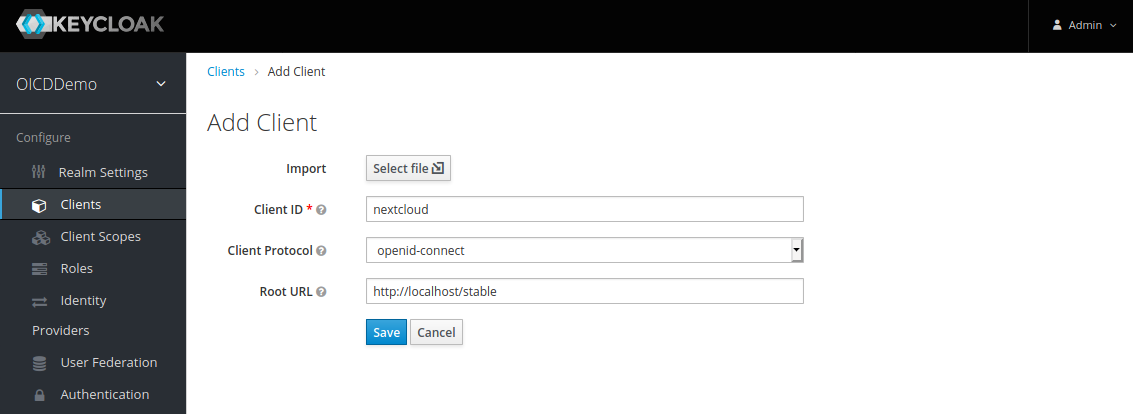
Next we move on to the “Clients” tab, and created a new client:

Set a random “Client ID”, I chose “nextcloud” in this example, and the root URL of your Nextcloud which is http://localhost/stable in this case. After that we get redirected to the client configuration page. Most settings are already set correctly. We only need to adjusted two more settings.

First we set the “Access Type” to “confidential”, this is needed in order to get a client secret which we need for the Nextcloud setup later on. While the “Valid Redirection URIs” work as it is with the wildcard, I used the one proposed by the Nextcloud OIDC app http://localhost/stable/index.php/apps/user_oidc/code. This is the Nextcloud end-point to which Keycloak will redirect the user back after a successful login.
Finally we create a user who should be able to login to Nextcloud later.

While technically the “Username” is enough I directly set E-Mail address, first- and second name. Nextcloud will reuse this information later to pre-fill the users profile nicely. Don’t forget to go to the “Credentials” tab and set a password for your new user.
That’s it, now we just need to grab a few information to complete the Nextcloud configuration later on.
First we go back to the “Realm Settings” of the “OIDCDemo”, under “OpenID Endpoint Configuration” we get a JSON document with all the parameter of our OpenID-Connect end-point. For Nextcloud we only need the “authorization_endpoint” which we find in the second line of the JSON file.

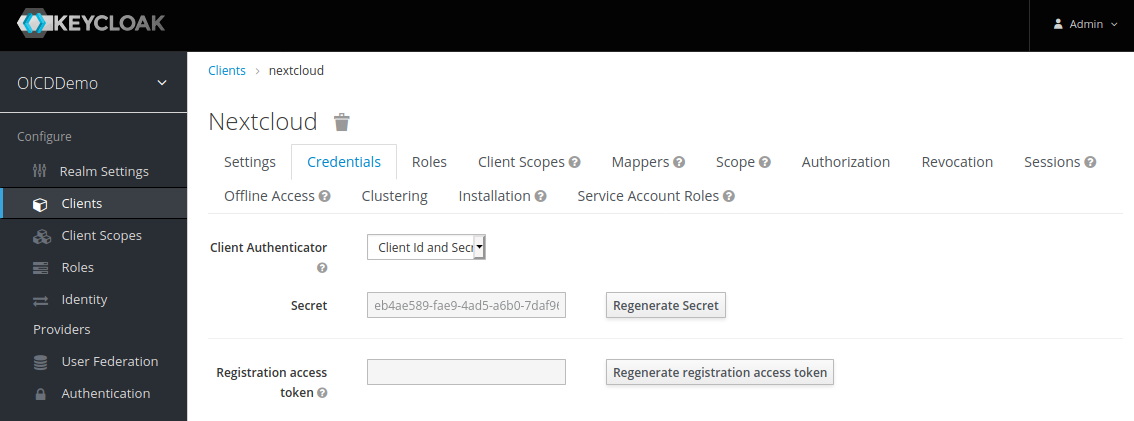
The second value is the client secret. We can find this in the credential tab of the “nextcloud” client settings:

Nextcloud setup
Before we continue, make sure to have this line in your config.php 'allow_local_remote_servers' => true,, otherwise Nextcloud will refuse to connect to Keycloak on localhost.
Now we can move on and configure Nextcloud. As mentioned before, the official OpenID-Connect app was released together with Nextcloud 19, so you need Nextcloud 19 or later. If you go to the Nextcloud apps management and search for “openid” you will not only find the official app but also the community apps. Make sure to chose the app called “OpenID Connect user backend”. Just to avoid misunderstandings at this point, the Nextcloud community does an awesome job! I’m sure the community apps work great too, they may even have more features compared to the new official app. But the goal of this article was to try out the officially supported OpenID-Connect app.
After installing the app we go to the admin settings where we will find a new menu entry called “OpenID Connect” on the left sidebar. The setup is quite simple but contains everything needed:

The app supports multiple OpenID Connect providers in parallel, so the first thing we do is to chose a “Identifier” which will be shown on the login page to let the user chose the right provider. For the other fields we enter the “Client ID”, “Client secret” and “Discovery endpoint” from Keycloak. After accepting the setting by clicking on “Register” we are done. Now let’s try to login with OpenID Connect:

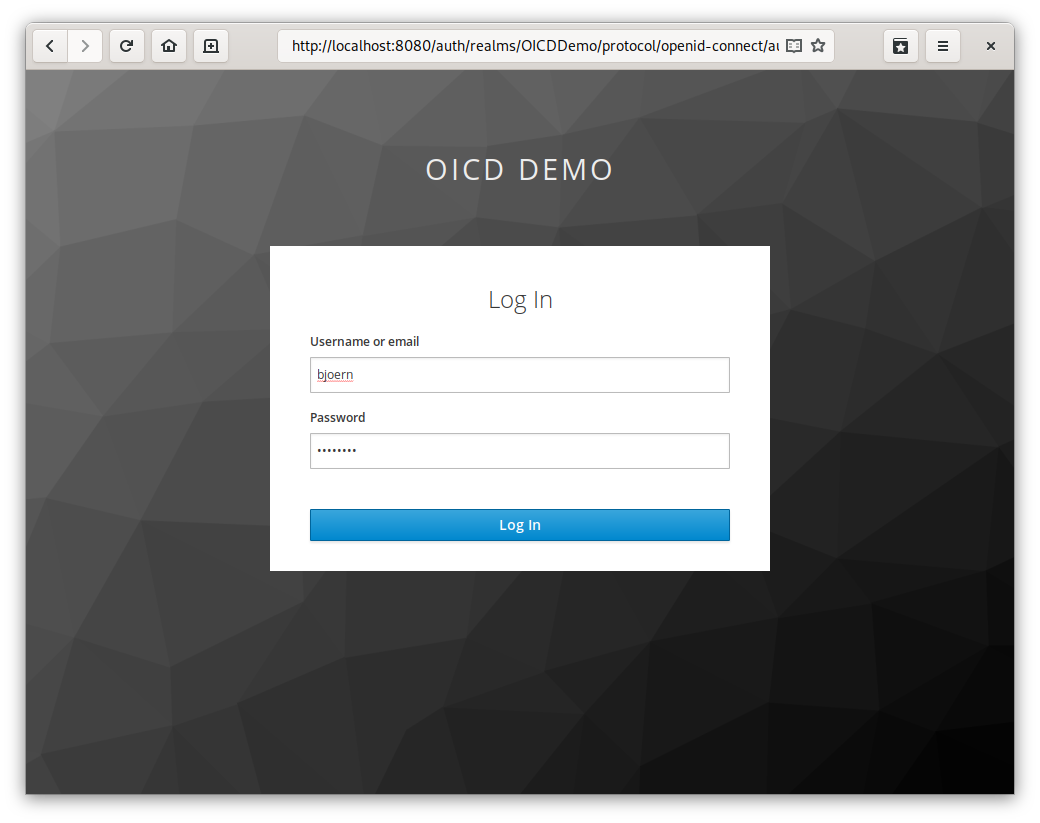
As you can see, we have now an additional button called “Login with Keycloak”. Once clicked we get re-directed to Keycloak:

After we successfully logged-in to Keycloak we get directly re-directed back to Nextcloud and are logged-in. A look into our personal settings shows us that all our account detail like the full name and the email address where added correctly to our Nextcloud account:

Author

Computer Scientist (Dipl. Inf.), graduated at University of Stuttgart, Germany.
Active in the Free Software movement for over 25 years.
Long-term volunteer at FSFE and member of the General Assembly.
Co-founder and PreSales-Lead of Nextcloud.
Comments